
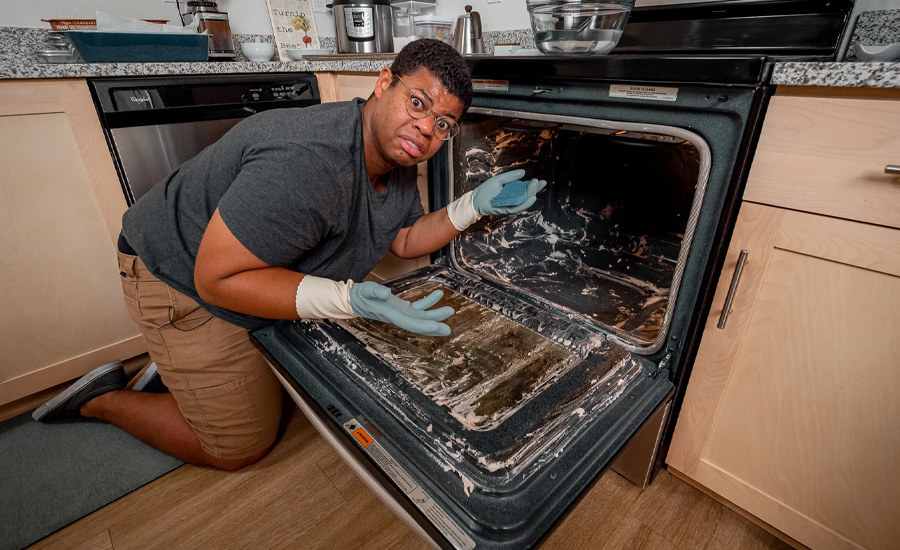
An oven is a key investment and works hard in your home. Keeping it clean boosts its performance and lifespan. Though cleaning it seems daunting, it’s often easier than expected. Whether you have a self-cleaning model, use a store-bought cleaner, or just soap and water, this guide simplifies the process. Ovens are like magnets for mess, attracting steak drippings, burnt fries, and greasy grime. Feeling lost in the chaos? Fear not! A gleaming oven not only shines but also elevates your culinary creations. Just imagine the delicious rewards that await behind those spotless doors! Deep cleaning isn’t as scary as it seems. From a simple button press to homemade solutions, we’ve got you covered on how to clean an oven. Read on for tips on cleaning solutions and how to clean an oven.
What Happens if You Don’t Clean Your Oven?
Letting that oven slide into neglect can ignite a host of headaches. Tucked away food residue and grease can sprout unwelcome odors, alter your culinary creations, and conjure smoky surprises that sting your eyes and lungs. Over time, that pesky buildup morphs into a fire hazard, with grease acting like kindling. The National Fire Protection Association points out that cooking equipment sparks most home fires, and dirty ovens often fan those flames. What’s more, a dirty oven works overtime to maintain temperature, resulting in costly utility bills. Regular cleaning not only enhances performance but also sidesteps pricey repairs while crafting a safer cooking space. So, keep your oven in sparkling shape—it’s vital for optimal functionality and the health of your household.
Why Choose Natural Cleaning Methods?
Using natural cleaners like baking soda and vinegar has many benefits:
- Non-Toxic: Say goodbye to harsh chemicals! Our natural cleaners are your family’s haven.
- Eco-Friendly: Both baking soda and vinegar are biodegradable; Mother Nature will thank you.
- Cost-effective: These everyday heroes are accessible and affordable.
How to Clean an Oven With the Self-Cleaning Feature
Maximize your oven’s cleaning efficiency with its self-cleaning feature. Say farewell to stubborn food remnants and grease without the backbreaking scrubbing. “Most ovens boast a dedicated button or control panel for this feature,” remarks Alicia Sokolowski, president and co-CEO of AspenClean. First, clear the oven of all items, then simply press that magical button. The self-cleaning cycle will kick into gear, typically taking several hours, depending on your model. “During this process, your oven will ignite to blazing temperatures, often reaching up to 900 degrees Fahrenheit, to incinerate those pesky residues,” Sokolowski explains.
Patience is key—let your oven cool down once the cycle is complete. After it cools, pare down the remnants by wiping surfaces with a damp microfiber cloth. Voilà! Your oven shines like new, ready for culinary adventures ahead!
Materials Needed
If you’re cleaning your oven manually, have these supplies ready.
- Baking soda
- White vinegar
- Water
- Dish soap
- Spray bottle
- Small bowl
- Scrubbing sponge or brush
- Bathtub or large container
- Microfiber cloth
Step-by-Step Guide to Deep Cleaning Your Oven Naturally
Clean your oven with baking soda and vinegar. This method is safe, effective, and eco-friendly. Just follow these simple steps:
1.Preparation
- Safety First: “Allow the oven to cool down completely before diving into the cleaning adventure.”
- Remove Oven Racks: Remove the racks for effortless access to the oven’s inner sanctum.
2. Cleaning the Oven Racks
- Soak: Submerge the racks in a warm bath of soapy water. Allow them to luxuriate for at least two hours, softening stubborn grime and restoring their shine.
- Scrub: Once soaked, take a gentle scrubber to banish stubborn residue. Rinse until sparkling, then let them bask in the sun to dry.
3. Creating the Baking Soda Paste
- Mixing: In a small bowl, whisk together 1/2 cup of baking soda with a splash of water until it becomes a spreadable paste. Feel free to tweak the texture to suit your needs.
4. Applying the Paste
- Application: Gloved up and ready, apply your baking soda paste with finesse. Coat the oven’s inner surfaces, steering clear of those hot heating elements. Focus intently on spots with stubborn buildup; they’re the real troublemakers.
- Rest Period: Let the paste rest for 12 to 24 hours. In this magic moment, the baking soda tackles grease and grime, breaking them down into submission.
5. Wiping Away the Paste
- Initial Wipe: Once your resting moment concludes, take a damp cloth in hand. Gently wipe away the remnants of that stubborn baking soda paste. Extract as much as you can for a sparkling finish!
- Stubborn Residue: For stubborn spots, gently wield a plastic or silicone spatula. This tool is your ally in banishing stubborn residue with a soft touch. Scrape away the remnants and restore your surface to its former glory.
6. Spraying with Vinegar
- Vinegar Solution: “Grab a spray bottle and blend water with white vinegar in harmony. Mix equal parts to unleash a powerful, natural cleaner. Together, they create a refreshing solution for tackling tough messes.”
- Spray: * * A gentle mist of vinegar graces the oven’s interior surfaces. As the two mingle, they spark a subtle, foaming dance. This bubbly reaction effortlessly lifts away stubborn residue, leaving the oven refreshed.
7. Final Wipe Down
- Clean: Give your surfaces a gentle embrace with a clean, damp cloth. This ritual sweeps away all traces of baking soda and vinegar remnants, ensuring a spotless finish.
- Dry: “Conclude your task by caressing the interior with a soft, dry cloth.”
8. Cleaning the Oven Door
- Glass Surface: Slather the baking soda paste onto the oven door’s inner canvas, honing in on stubborn stains. Allow it to work its magic for 30 minutes. Then, wipe away the remnants with a damp cloth for a sparkling shine.
9. Reassembling
- Replace Racks: After everything sparkles and dries, slide the oven racks back into place.
How Often Should You Clean Your Oven?
Preventive maintenance is crucial for avoiding accumulation.
- Light Use: For those rare oven users, make it sparkle every six months. Let your culinary canvas shine brightly! A thorough, deep clean works wonders, banishing stubborn stains and lingering odors. Transform your oven from dust collector to kitchen queen!
- Regular Use: For passionate cooks, a quarterly deep clean is a must. It’s the secret ingredient to a sparkling kitchen and culinary success! Dust bunnies and grease won’t stand a chance against your scrub. Embrace this ritual; it is a refreshing reboot for your cooking haven. Transform your space into a chef’s paradise, ready for culinary adventures!
- Heavy Use: If you’re a baking enthusiast or a roasting aficionado, every three months, let’s roll up those sleeves for a deep clean. Keep your kitchen sparkling and your culinary passion soaring!
Also, it’s best to wipe up spills after the oven cools. This prevents residue from hardening.
Additional Tips
- Gentle Touch: Abrasive tools can scratch your oven’s delicate surfaces. Opt for soft cloths and gentle sponges instead.
- Breathe Easy: Keep your space airy while cleaning to whisk away pesky odors.
- Routine TLC: A quick monthly wipe-down prevents grime from becoming a stubborn guest.
Embrace these steps and unlock the secret to oven bliss. With a consistent cleaning routine, your oven will shine and perform at its best. Choose safe, natural, and budget-friendly methods to keep your culinary companion in tip-top shape. Here’s to a sparkling kitchen and delicious meals!